Posts

Showing posts with the label Burning of Prospero

Horus Heresy 30k Thousand Sons Contemptor Dreadnought#1
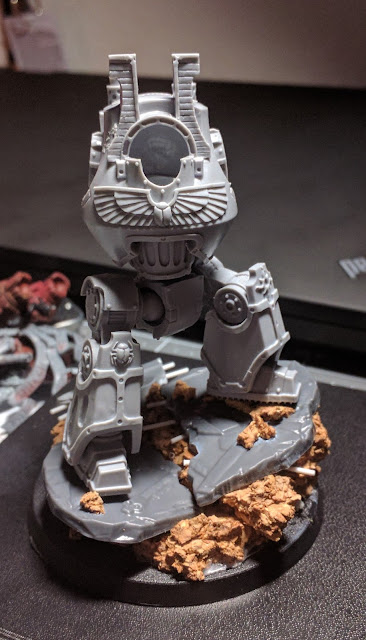
Image
So  I ordered  a Dreadnought for the CK Studios course, unfortunately it arrived two days late. That being said, I was still pumped from the course, so I started to build a the Dreadnought. One thing that always bugs me about Dreadnought builds is the static poses that you see.  So I did my best to put some movement into this build. I tried my best  to  imitate and mirror the Konrad Kurze pose. Now I just have to work out how I want to kit this Dreadnought. I am thinking Heavy Conversion Beamer and Power Fist.  What do you think?

CK Studios Introductory Airbrushing Course #5 - How it all turned out?

Image
So now we have all the theory sorted, let's put this into motion. As mentioned before, this is how it turned out, but how did we get to this? Zenithal Highlight on the black primer coat. Base colours go over the primer coat. You'll see in the photo the triad+ of colours used. They are all  Vallejo. For the Death Guard Linen White VGA Hemp, VGA Bonewhite, VGA Aged White and VGA Aged White. On the shoulders, I used the following for the Green, VGA Black Green, VGA Sick Green and VGC Goblin Green. You will notice, I haven't quite gotten the hang of the colour modulation on the Shoulder guards and Power Fist. So what do you do if you mess up your colour modulation?  Well it's simple, you paint over it. The layers this style of airbrushing are so thin, it is easy to go back in and re-establish the dark tones and highlights . I will mention I swapped out the base and used one that I had already made for a World Eater Contemptor.  I also re-posed ...

CK Studios Introductory Airbrushing Course #4 - The Overall Technique

Image
 So after being bombarded with all this theory, how do we put this together?   Simply put, you follow five steps, and it will all come together. Just make sure you have kept your zenithal primer coat.  Base coat with a mid-tone. Make an effort with coverage to focus on the highlight areas and smoothly transition, very lightly, into the dark recesses. Don't destroy your zenithal and remember to draw focus to the most important areas. Deepen the shadows with your darkest tone. try not to create hard horizontal lines, remember your color modulation techniques. Concentrate on the small spot area highlights with your highlight color, again remember to modulate your coverage. Be very careful now, check your cylinder pressure and make sure your paint is thinned. This is where you shoot your most concentrated spot of highlight color. This is usually your highlight tone mixed with a little white. Now for the secret sauce. You'll have to attend the course to unders...

CK Studios Introductory Airbrushing Course #3 - Colour Modulation

Image
Colour Modulation is a technique where you fool the eye into thinking there is more volume and perspective over a flat surface. Panels are divided into light and dark and adjoining panels are opposite. So a light highlight will meet a different panel with a deep shade. Below is a diagram of how this will look. Arrows denoting the angles by which you shoot your airbrush. Here is an example of colour modulations in high contrasting purples, courtesy of Justin. The modulation creates movement across the panels and gives a realism and solidity to the miniature. Now some of you may understand flat panels, but you may want to know how to apply this technique to a round surface. Don't worry just follow the process below. Dark shades in rounded pattern. Spot highlights from the opposite direction. Easy Peasey, Lemon Squeezey, hey? Well not really. Practice makes perfect. And you'll probably have this technique baked by the second attempt. More to come