Posts

Showing posts from November, 2016

World Eaters Contemptor Dreadnought Part #10

Image
Work continues on the World Eater Close Combat Contemptor Dreadnought. I still have to finish off the head, clean up some over-spray speckling on the fists and add weathering. What do you think?

Horus Heresy 30k Vlka Fenryka Contemptor Mortis Dreadnought #5

Image
It was a long journey, but we finally got there. Here is the VI Legion Vlka Fenryka Contemptor Mortis Dreadnought.   What do you think?

Horus Heresy Characters - Ahzek Ahriman #1

Image
Second miniature I have started working on, from the Prospero boxed set has been Ahzek Ahriman. First Captain and Chief Librarian of the Corvidae, XV Legion Thousand Sons. I will have to say I am fairly happy with how the metallic red turned out on this one. I tweaked my usual recipe this time. It was as follows: Primer - Badger Stynylres Black. Base - VGA Steel all over. First Shade - VGA Brassy Brass - Shoot this straight/vertically from below. This should give you a good base shadow to offset the steel color. First highlight - 1/3 VGA Steel 2/3 Minitaire Ghost Tint Fresh Blood - I did this mainly because there will be very little tooth for the ghost tint to adhere to initially. Second shade - VGA Ink Red Ink - Shot into the lower and deeper recesses of the armor. Second highlight - 2-3 coats of Minitaire Ghost Tint Fresh Blood zenithal @ low pressure (15-20psi). After you do this the miniature should look a little like picture shown above.

Horus Heresy 30k Sisters of Silence #1

Image
Burning of Prospero has dropped, so I got stuck into putting together a Vigilator squad armed with greatswords. I did make one little tweak to my squad though, as I wasn't quick enamored with the helmets/heads supplied with the miniatures. My thought would be that the Vigilators would all be nondescript Sisters with full face helmets, with the squad leader having a more ornate helmet. I will go through my recipe for their armor if they turn out. Let's just say this group is still on trial.

Horus Heresy 30k World Eaters Red Butchers #5

Image
I got a chance to start working on the power axes on my squad of Red Butchers. I went with a green graduation on the power axes, mainly to offset the red armor panels and give the miniatures a little pop. I still need to finish up the axe hafts/handles, deepen the shading on the brass and edge-highlight the red armor panels. More to come.

Imperial Knight Titan - Legio Audax Auxcillary Part #3

Image
Somehow Blogger kinda messed up with this , so I guess I will wing it. So here I h ave the starting paint job . I am trying to work through a metallic cher ry red , given this fellow is a World Eaters support tit an. I still need to work through this on e. not wuite happy with the paint scheme , yet More to come.

Horus Heresy 30k World Eaters Leviathan Dreadnought #5

Image
I found some time to work a little more on the Leviathan, just like the Contemptor I airbrushed burnt umber ink into the edges and areas where one would expect high wear and tear. Just need to find some more time to keep on plugging away at this one. More to come.

Horus Heresy Characters - Angron kit-bash #5

Image
Still trying to work out what color scheme I should use on my Angron kit-bash. My main stumbling block is currently The Armour of Mars. I like idea of red armour, to symbolize the red of the planet Mars, but it should really feature more bronze. The base looks half decent, though. More to come.

World Eaters Contemptor Dreadnought Part #9

Image
I started with the initial weathering for the Contemptor, today. Spraying in Burnt Umber ink into the armour edges where significant wear and tear will be visible. You notices that I also finished off the replacement right hand combat claw, as I was not happy with the look of the previous claw that had the chainsaw.  In fact I might freeze the previous one and redo it with the chainsaw to the bottom of the fist, similar to how it is represented on a Tartaros Terminator Chainfist. Now to blackline ink wash and oil stain torso and legs, finish the chest detail and finish the combat claw arms. More to come.

Imperial Knight Titan - Legio Audax Auxcillary Part #2

Image
Work continues on the base of the Knight Titan. It may look a little busy, at present, but that will even out once paint goes down. Each side of the base has little scenes of desperate defense, only for the grim dark reality of a Legio Audax Knight to stride over their corpses. Time to wash the legs and start putting down paint. More to come on this one, folks.

Horus Heresy 30k and Thousand Sons #10

Image
The Burning of Prospero has been released, but I haven't had much time to finish off my second Tactical Squad. In my haste to complete this squad, I kinda messed up my usual cherry red recipe for the Thousand Sons. Here is how this batch turned out. Not sure I am happy with the way they turned out, yet. I may have to strip them and start again. Not sure yet. What do you think?

World Eaters Contemptor Dreadnought Part #8

Image
Some progress on not only the knee and elbow armor pads. I went with my standard blue transition recipe: Primer coat of Stynylres Black Base color of VGA Imperial Blue First transition VGC Turquoise Second transition VGA Electric Blue Third transistion VGA Wolf Grey Final highlight of VGA Dead White Just be careful and thin your paints well, the VGA Wolf Grey and Dead White can spatter like a be-arch. I may have to come back in with the VGA Imperial Blue and clean up the spatter. I also started a bunch of World Eater backpacks using the same recipe. More to come.

Horus Heresy 30k and the Vlka Fenryka Drop Pod #2

Image
I got around to masking off the drop pod and adding some striping. I know, not the traditional hazard stripe colors, but I am distinguishing this Drop-pod from my previous effort. Here is a progress shot. So here is how you can get this effect. Starting with the drop-pod shown below. I then went in and taped off the larger recessed area with the blue painter's tape. Just note there are a few areas where the recesses are a little uneven and add a little tape to those too. Go in and paint the recess with VGC Heavy Red. When the red layer dries, paint a center highlight line of VGC Bloody Red.  This will give a nice depth to the recessed area. Once the red is dry, I taped off the recessed area again, this time with Tamiya 5mm Masking tape. I used the Tamiya tape mainly because it will give consistent spacing between stripes. I went back in and painted the black striping. First a layer of VGA Black. When the black was dry  I went in and did a thin gradient of VGA C

General Ramblings - Decals / Water-slide Transfers with MicroSol and MicroSet

Image
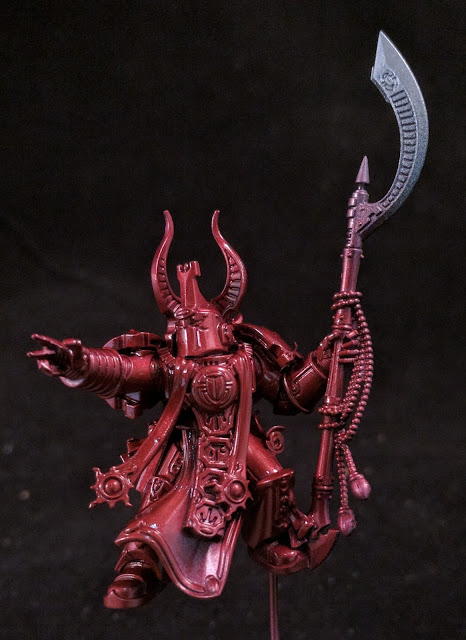
Water-Slide Transfers - Decals - "De'ee'cals" - Whatever you want to call them. There is a common amount of trepidation that is associated to the use and application of decals. Why is this the case? Today I will go through a simple way of preparing, using, applying and  finishing decals. In this example I will focus on shoulder pauldron decal details. To do this, you need to get your hands on a few things. Decals Scissors/Hobby Knife Tweezers (Optional) Small Water dish Gloss Varnish MicroSol MicroSet Grab your miniature and paint it up to a stage where you want to apply decals. I will leave it up to you to chose what stage, pre-weathering or post-weathering. Please bear in mind that you might have to go back in and weather the decal, later. Given you have a model  ready, you need to get your hands on your transfer sheet. In this case we'll use the ForgeWorld Thousand Sons Transfer sheet as our example. Next you should get your hands on some Mic