
General Ramblings - Decals / Water-slide Transfers with MicroSol and MicroSet
Water-Slide Transfers - Decals - "De'ee'cals" - Whatever you want to call them. There is a common amount of trepidation that is associated to the use and application of decals. Why is this the case?
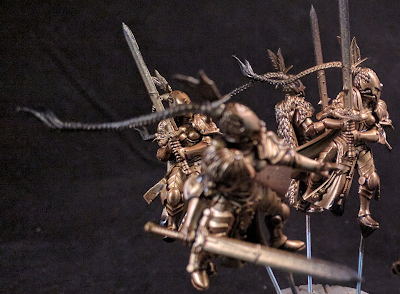
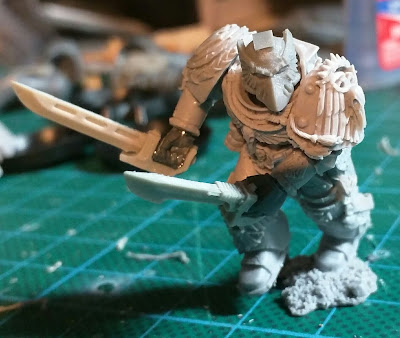
Today I will go through a simple way of preparing, using, applying and finishing decals. In this example I will focus on shoulder pauldron decal details. To do this, you need to get your hands on a few things.
Given you have a model ready, you need to get your hands on your transfer sheet. In this case we'll use the ForgeWorld Thousand Sons Transfer sheet as our example.

Next you should get your hands on some MicroSol and MicroSet. Now the Scale modellers and Railway modellers have been using this stuff for decades. More recently other vendors have been getting into this game, like Vallejo etc. So really, it's up to you on which company to use. I prefer MicroScale Industries MicroSol and MicroSet.

Now for the process:
1) Grab miniature.
2) Paint Miniature.
3) High Gloss Varnish the area that you want to place the decal on. You can use either an airbrush, spray/rattle-can or hand paint this. Up to you, just don't forget this step otherwise you wil end up with the "shiny halo" around your decal, when everything is finished. This way everything is shiny and the final product will look more uniform and more like it was hand painted.

4) Wait the 1-24 hours for your Varnish to fully cure. I usually spray a day before and leave over night.
5) Grab your small dish of water and fill with water.
6) Cut the transfer out, pay attention to cutting the area just around the transfer. You don't need to cut a massive offset. See below - in red.

7) Dunk the transfer into the water dish, fully submerging the transfer. You don't really need to time this, but it should only take between 30-50 seconds to loosen up.
8) While the Transfer is softening, grab a clean cue-tip / cotton-bud and dip. Dip this into the MicroSet. It is very important to use MicroSet first, otherwise you pretty much bugger up the whole thing.
9) Dab the MicroSet onto the area you have previously varnished, preferably where you want the decal to go.
10) With an older clean paint brush, check if the decal is moving on the slide backing paper, if it is, it's ready to rock and roll, if not, wait a few seconds more.
11) When the transfer is sliding on the backing paper, pick it up out of the water, you can use tweezers, paintbrush and/or hobby knife, whatever. Now sometimes you might find you left things a little long and the transfer has come free of the paper and is floating about in the water. Not to worry, your brush and/or hobby knife is adequate to fish the sucker up and out of the water.
12) Slide the transfer onto the area that you pre-wet with MicroSet. I prefer to use a paint brush to do this. I don't get particularly concerned about placement at this time, especially if I have pre-wet the area with MicroSet.
13) With the same cue-tip / cotton-bud that you dunked in the MicroSet, push the decal into position, try and line it up so it looks square. Don't worry so much if it is not conforming to the shape of the Shoulder Pauldron. That will sort itself out in later steps. I tend to roll the cue-tip / cotton-bud over the surface, at this time, kind of like you would roll out some dough.
14) With a DIFFERENT clean cue-tip / cotton-bud roll over the transfer and try to quickly soak up any excess MicroSet.
15) Dip the other clean and dry end of this cue-tip/ cotton-bud into the MicroSol and dab this onto the decal first then, again, roll over the surface of the decal. The MicroSol will now "shrink" or slightly dissolve the decal so it will conform to the surface. Leave the miniature and transfer for a few minutes, anywhere between 2-5 minutes (enough to repeat the process on another miniature).
16) OPTIONAL - if the decal hasn't settled into the curve or shape, hit it again with the MicroSol. Keep on repeating this step until you're happy with how the decal settles onto the surface.
17) Wait 12+ hours, depending on the weather, humidity, heat, swamp gas on Mars, etc. Just give the transfer enough time to fully cure and adhere. It should end up looking like below

18) Once cured, hit the area again with gloss varnish. This will seal it all in and protect the decal from wear and tear. It will probably look a little too shiny, but we can solve this in the next step.

19) Depending on how you like things to look, go back and weather the miniature. Pay attention to do some minor chipping effects via the sponge technique, to tie the transfer into the miniature.
20) Seal everything again with a final coat of High Gloss Varnish.

21) OPTIONAL - Finally seal with either a Matte Varnish or Satin Varnish. Up to you which one you choose.
There you have it folks. Go try it out. It's not as hard as you think. You might just find it simple to do and go crazy and decal everything.
Today I will go through a simple way of preparing, using, applying and finishing decals. In this example I will focus on shoulder pauldron decal details. To do this, you need to get your hands on a few things.
- Decals
- Scissors/Hobby Knife
- Tweezers (Optional)
- Small Water dish
- Gloss Varnish
- MicroSol
- MicroSet
Given you have a model ready, you need to get your hands on your transfer sheet. In this case we'll use the ForgeWorld Thousand Sons Transfer sheet as our example.
Next you should get your hands on some MicroSol and MicroSet. Now the Scale modellers and Railway modellers have been using this stuff for decades. More recently other vendors have been getting into this game, like Vallejo etc. So really, it's up to you on which company to use. I prefer MicroScale Industries MicroSol and MicroSet.

Now for the process:
1) Grab miniature.
2) Paint Miniature.
3) High Gloss Varnish the area that you want to place the decal on. You can use either an airbrush, spray/rattle-can or hand paint this. Up to you, just don't forget this step otherwise you wil end up with the "shiny halo" around your decal, when everything is finished. This way everything is shiny and the final product will look more uniform and more like it was hand painted.

4) Wait the 1-24 hours for your Varnish to fully cure. I usually spray a day before and leave over night.
5) Grab your small dish of water and fill with water.
6) Cut the transfer out, pay attention to cutting the area just around the transfer. You don't need to cut a massive offset. See below - in red.
7) Dunk the transfer into the water dish, fully submerging the transfer. You don't really need to time this, but it should only take between 30-50 seconds to loosen up.
8) While the Transfer is softening, grab a clean cue-tip / cotton-bud and dip. Dip this into the MicroSet. It is very important to use MicroSet first, otherwise you pretty much bugger up the whole thing.
9) Dab the MicroSet onto the area you have previously varnished, preferably where you want the decal to go.
10) With an older clean paint brush, check if the decal is moving on the slide backing paper, if it is, it's ready to rock and roll, if not, wait a few seconds more.
11) When the transfer is sliding on the backing paper, pick it up out of the water, you can use tweezers, paintbrush and/or hobby knife, whatever. Now sometimes you might find you left things a little long and the transfer has come free of the paper and is floating about in the water. Not to worry, your brush and/or hobby knife is adequate to fish the sucker up and out of the water.
12) Slide the transfer onto the area that you pre-wet with MicroSet. I prefer to use a paint brush to do this. I don't get particularly concerned about placement at this time, especially if I have pre-wet the area with MicroSet.
13) With the same cue-tip / cotton-bud that you dunked in the MicroSet, push the decal into position, try and line it up so it looks square. Don't worry so much if it is not conforming to the shape of the Shoulder Pauldron. That will sort itself out in later steps. I tend to roll the cue-tip / cotton-bud over the surface, at this time, kind of like you would roll out some dough.
14) With a DIFFERENT clean cue-tip / cotton-bud roll over the transfer and try to quickly soak up any excess MicroSet.
15) Dip the other clean and dry end of this cue-tip/ cotton-bud into the MicroSol and dab this onto the decal first then, again, roll over the surface of the decal. The MicroSol will now "shrink" or slightly dissolve the decal so it will conform to the surface. Leave the miniature and transfer for a few minutes, anywhere between 2-5 minutes (enough to repeat the process on another miniature).
16) OPTIONAL - if the decal hasn't settled into the curve or shape, hit it again with the MicroSol. Keep on repeating this step until you're happy with how the decal settles onto the surface.
17) Wait 12+ hours, depending on the weather, humidity, heat, swamp gas on Mars, etc. Just give the transfer enough time to fully cure and adhere. It should end up looking like below

18) Once cured, hit the area again with gloss varnish. This will seal it all in and protect the decal from wear and tear. It will probably look a little too shiny, but we can solve this in the next step.

19) Depending on how you like things to look, go back and weather the miniature. Pay attention to do some minor chipping effects via the sponge technique, to tie the transfer into the miniature.
20) Seal everything again with a final coat of High Gloss Varnish.

21) OPTIONAL - Finally seal with either a Matte Varnish or Satin Varnish. Up to you which one you choose.
There you have it folks. Go try it out. It's not as hard as you think. You might just find it simple to do and go crazy and decal everything.


Comments
Post a Comment