Posts

Showing posts from December, 2015

Space Wolves Venerable Contemptor Dreadnought #6

Image
So if you're building a dynamic model, you have to put it on a base that tells the same story. So I made a little effort to create something with a few levels. Created with some cork and PVA glue. Drowning the base with ballast, to give it some texture.  More to come.

Space Wolves Venerable Contemptor Dreadnought #5

Image
Now it's time to rebuild the Contemptor Dreadnought close combat weapon, mainly because it just looks so whimpy. Attaching some claws from the plastic Bjorn kit. First I snipped the tips off the fingers, drilled the stumps and the claws, finally pinning them into place. Staggering the fingers to make it look like his claw is reaching forth to grab a foe. Attaching the claw to the Contemptor torso. More to come.

Space Wolves Venerable Contemptor Dreadnought #4

Image
Some Plasticard tubing and a few well position cuts. Et voila!  More dynamic legs for the Contemptor. Note I cut the ends from the normal Dreadnought legs, to get them flat. Sheathed a bunch of Plasticard tubes, russian doll style, and added the tile shield from the Space Wolf Wolf Guard Terminators accessory sprue. More to come.

Space Wolves Venerable Contemptor Dreadnought #3

Image
Working on the power plant for the Contemptor, this time. Starting with the removal of the old powerplant, using a jeweler's saw. Just a note to you folks out there, glue the torso together first and be very careful when doing this.  Clean the sprue lines from the Venerable Space Wolves Dreadnought powerplant. Then I cut a piece of plasticard, fitted it to the new powerplant, attaching that to the chassis. Note I left the pipes from the original Contemptor.   Now fully assembling the powerplant.  Looks properly Wolfie enough, now.  And here is an angle showing the original piping.   And the torso, from the front. More to come.

Space Wolves Venerable Contemptor Dreadnought #2

Image
So as you saw from the last post. Here is the framework I am working with. Pinning the hips back together with Platicard tubing.  Working through the placement and orientation. Choosing an orientation of the pelvis, that I liked. I checked the hips against one of the legs. Adding back the armor plating from the original plastic Contemptor. More to come.

Space Wolves Venerable Contemptor Dreadnought #1

Image
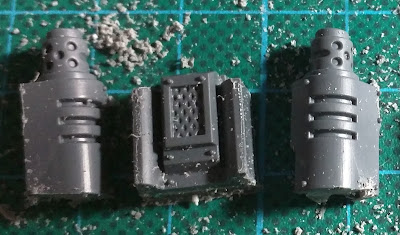
I was trawling around looking for ideas for a Venerable Contemptor Dreadnought for my Heresy Space Wolves Legion, when I happened on Den of Imagination and their interpretation on Bjorn. Inspiring, hey? Well I thought so, and hence I started to build my own, beginning with the plastic Contemptor Dreadnought. I am looking at this project as a dry-run for the Leviathan Dreadnought, with respect to sculpting wolf fetishes and paraphernalia onto the hull of the miniature. As often stated, the legs of the plastic Dreadnought are very static, so I thought I would alter them, starting at the hips, using the original plastic 40k Dreadnought hip joints. I took a jeweler's saw and cut the face plate away and will replace it with a face plate from the Venerable Space Wolf Dreadnought kit. Next, I will cut the powerplant away and use the Venerable Dreadnought's more embellished powerplant. Hopefully I can then find some time to press mold the fetishes f

The Unforgiven - Dark Angels #7

Image
Paint is down on the Veteran Sergeants. Same base primer and base coating recipe as you've seen before. And with blacklining wash and first layer of Vallejo Game Air Bone White on the tabards.

Happy Holidays!

Image
Happy Holidays, to all you folks out there that take the time to read this silly little blog. Santa came early, and let me give you a little sneak peak on something I will be working on very soon. You guessed it, a Leviathan Dreadnought with Storm Cannon and Grav Flux Bombard. But I may do some magnetizing and give him the option of a Siege Claw close combat weapon. Mainly because the rules for it are so bad ass.

The Unforgiven - Dark Angels #6

Image
The tactical marine blob squad (20) is almost complete. Just the heavy plasma gunners left to finish off. Job done up to a table top standard. I found that I did rush the edge highlights towards the end, a very tedious task across 20 marines, so it does show a bit. What I do think I need to do, is come back with a glaze of GW Waywatcher Green and knock back the brightness of it all.  Now I just have to finish the Plasma guns for this motley crew. More to come.

The Unforgiven Dark Consul Kit-Bash #1

Image
Work begins on my Dark Consul, re-purposing the Kurtha Sedd model with parts from the Dark Angels Command Squad. As I was already painting up the Unforgiven, the miniature was fast tracked to the spray booth. Starting with the usual recipe  of Vallejo German Grey primer coat . This was then followed by a base coat of Vallejo Game Air Dark Green.        I followed this with a zenithal highlight of Vallejo Game Extra Opaque Heavy Black Green. Then a deep wash of blacklining wash.  And with the first layer on the tabard, with Vallejo Game Air Bone White.   Plenty more work left on this one. More to come.

Harald Deathwolf kit-bash #2

Image
It has been a while since I touched this fellow, and as I was working on faces, I got around to his face, at the same time. I will have to work on his flowing beard, cloak, gems, bone talisman and the yellow pads.

Arjac Rockfist's Shieldbrothers #2

Image
Arjac's Shieldbrothers finally have a few faces. With blacklining to redefine the lower portion of the neck and armor Now to add the faces to the bodies. Stay tuned for that.

Bloodclaws Pack #3

Image
Whilst working on the 30k Consul Wolf Priest, I worked on the Wolf Guard Pack Leaders for the Blood Claw pack. I still need to go back in and apply Vallejo Shade Sepia wash on the hair and gold portions. Fix the teeth talismans, finish the storm shield. Highlight the brass back up to a gold. Points on the hair. Fix the yellow on the shoulder pads. Probably a bit more work needs to happen to the second Wolf Guard  While I was at it, I realized that I should round out my pack to a solid twenty Blood Claws. So I quickly threw this lot together.     Stay tuned for further progress.

Horus Heresy 30k and the Vlka Fenryka #8

Image
Work continues on the Consul Wolf Priest. This time I worked mainly on the fur effects. Simply done, Vallejo Game Air Bone White as the base color. The upper portion is then washed with blacklining wash, the mid portion is then washed with Vallejo Shade Sepia. When that all dries, highlight a few points with GW Celestra Grey or Vallejo Game Color Cold Grey I need to go back and highlight up the brass. And work out a scheme for the Plasma Pistols / Volkite weapon.

Objective Markers #8

Image
Paint has gone down on the wretched Tau sniper objective. After a Primer coat of Vallejo Polyurethane Primer Light Grey, I sprayed a base coat of Vallejo Game Air Brown Sand.    This was followed by a layer of Vallejo Game Air Yellow Ochre   This was then shade washed with Army Painter Strong Tone shade. Followed by  a recess wash of my blacklining wash. I still have to go back and re-layer the panels and follow up with edge highlights.